7 minutes
AWS SSO using Azure Identity - adding automation
If you didn’t see my previous blog post where I linked my Azure AD identity to AWS SSO, enabling for Single Sign-On to AWS for my Azure Users - check it out here.
In the previous blog post, we finished with a working solution where we could manually create an AWS SSO user and map it to an Azure AD user allowing for single sign-on. I always look to improve and simplify solutions and here is an example of how we can do that for our identity mapping to AWS SSO.
Today, I am going to enable automatic provisioning of user accounts, so as new users are added to my Azure AD and assigned to the AWS SSO application, either directly or via Group Membership, a corresponding AWS SSO user will be created automatically.
This means that I can manage my identities in a single location and not have to manage any accounts in AWS SSO.
Sound’s Good? Let’s get started!
Enable Automatic Provisioning
First, let’s navigate to the AWS Single Sign-on console, then go to Settings and click the Enable automatic provisioning link.

In window that pops up, you will see the values for the SCM endpoint and an OAuth bearer Access token. Take both of these values and save them to somewhere secure, we will need them soon.
Next, open a new browser tab, navigate to the Azure Portal and open the Azure Active Directory service.
From the left-hand navigation panel, select Enterprise Applications, then open your AWS SSO application that we created in the previous blog titled aws-sso-using-azure-identity.
Under the Managed set of options within the navigation panel, click Provisioning, then select Get started.
Within the Provisioning window select Automatic under the Provisioning Mode drop-down menu.
Copy and Paste your SCM EndPoint URL value within the Tenant URL field from the secure location you saved it to previously, along with your Access Token which needs to be entered into the Secret Token field.
Enter a valid email in the Notification Email field and then click Test Connection.
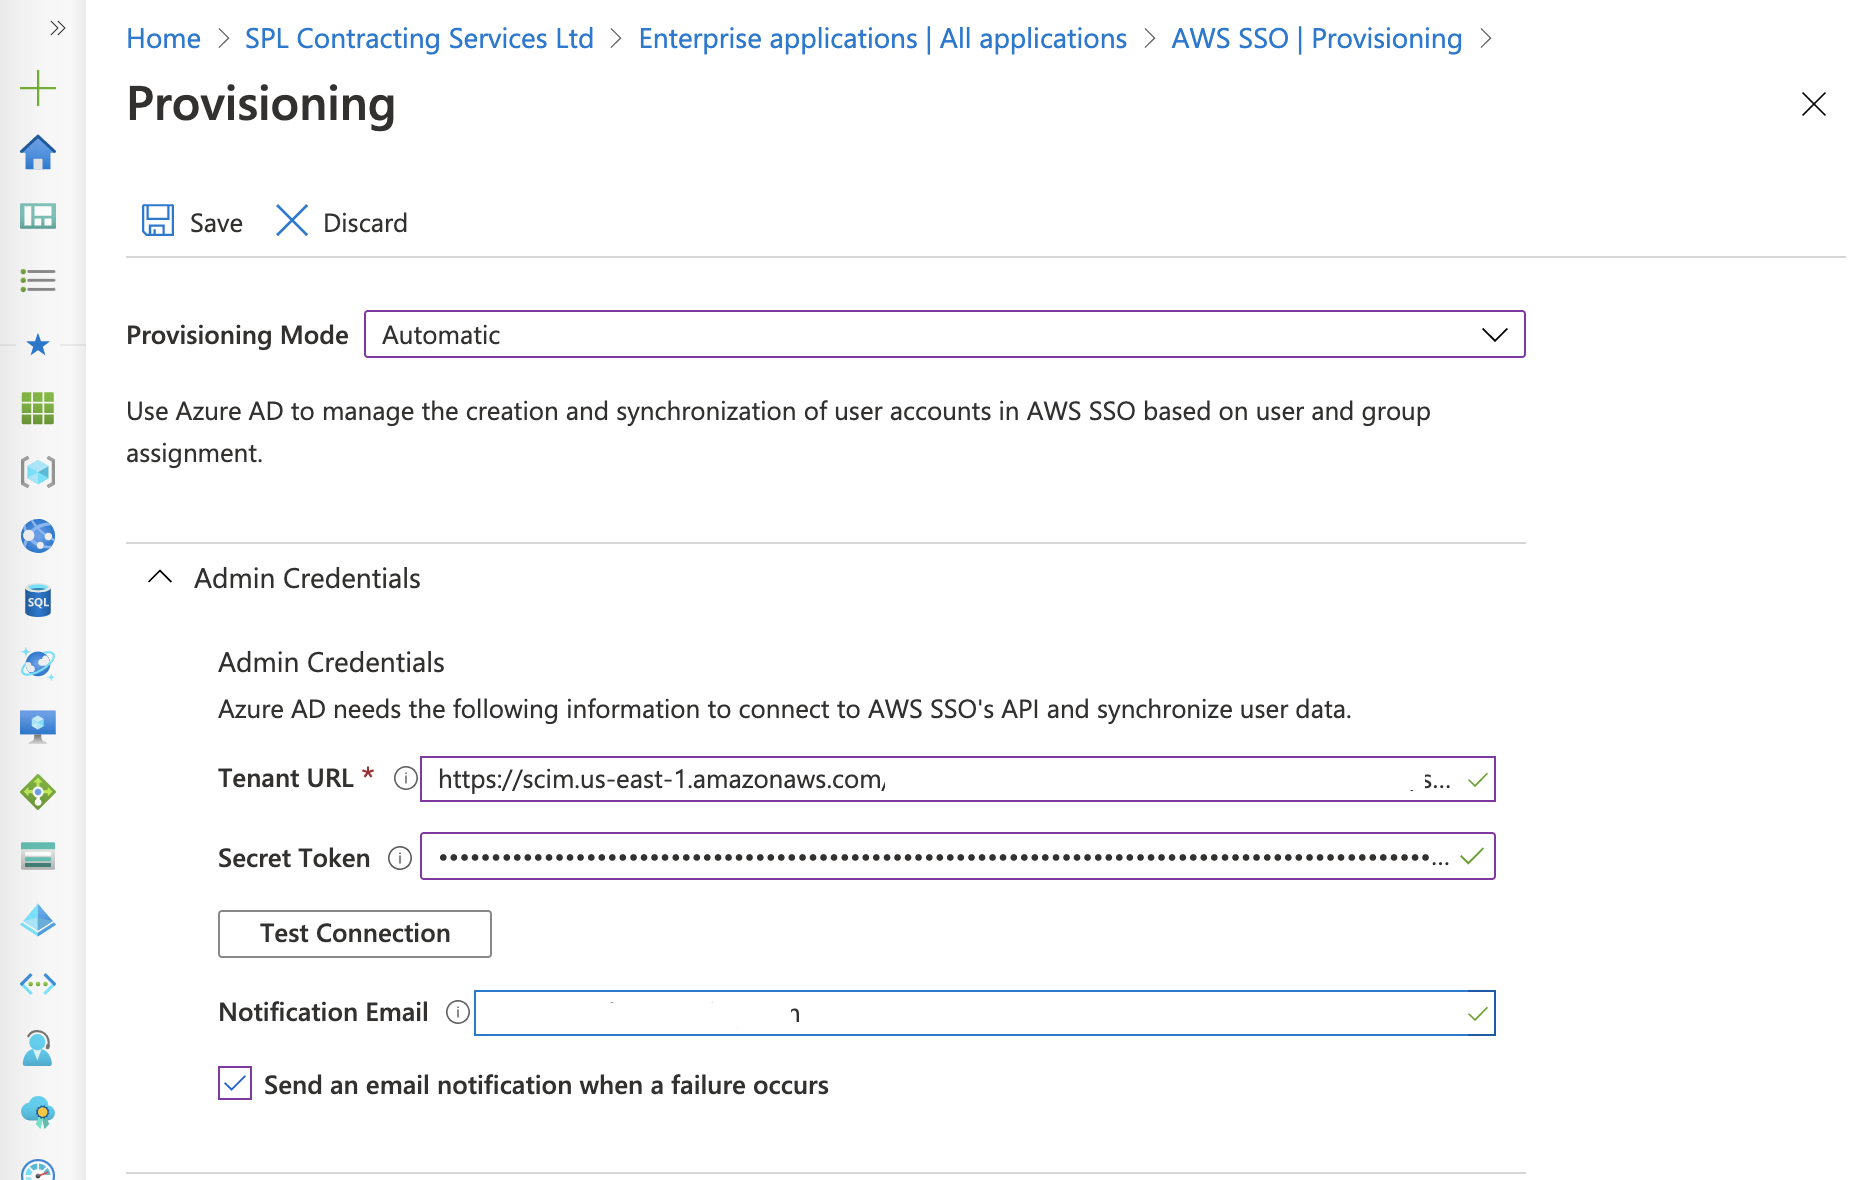
If this was successful you should see a pop-up box saying the test was successful.

Just a few more small steps and then we are done!
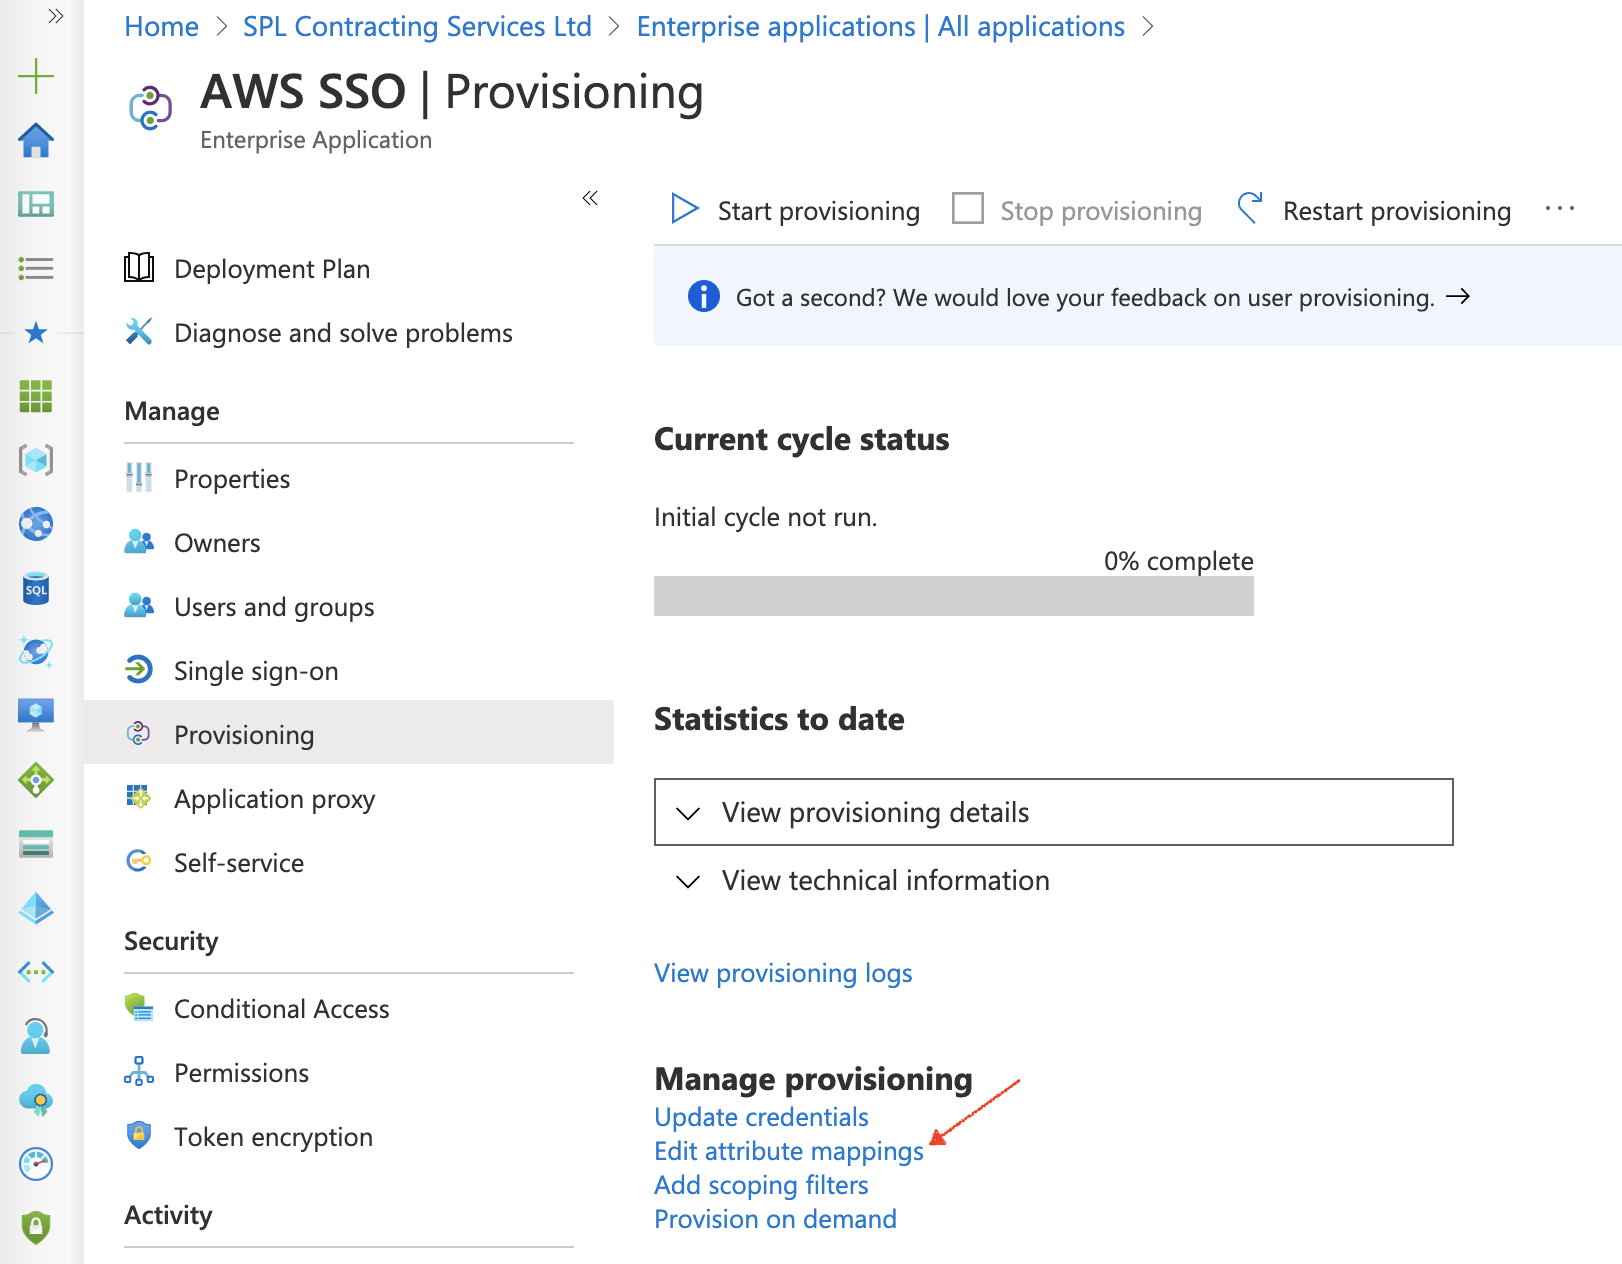
If we navigate back to our AWS SSO application and open the Provisioning option from the navigation panel, we can see that provisioning is configured but has not yet been run.
Under the heading Manage provisioning Click Edit attribute mappings.
In the Edit attribute mappings window, expand the Mappings drop down menu, then we need to select Provision Azure Active Directory Users. This is where we can edit the attributes that we wish to map over onto AWS SSO.
In the Edit Attribute pop-up menu edit the mailNickname attribute, amending the Source attribute to match the below configuration. Click Save, then Save again.
| Mapping Type | Direct |
| Source Attribute | objectId |
| Default Value | - |
| Target Attribute | externalId |
| Match Object | Yes |
| Precedence | 1 |
| Apply this mapping | During creation |
This is it for the automated provisioning configuration.
Adding Users and Groups
Next, we need to add Users and a Groups to the AWS SSO App. Within Azure AD I have created two groups for the purpose of this exercise called aws-sso-read-only & aws-sso-admins. I have also created a user called Bob, whom is a member of the read-only group . We will be assigning these entities to the Enterprise application for them to be provisioned automatically in AWS SSO.
If you don’t still have it open, head back to the Enterprise Application page, select your AWS SSO app and on the left-hand navigation panel, select Users and groups, click + Add user, select the option Users and groups then select your test user and groups in my case this is the user Bob & groups aws-sso-read-only and aws-sso-admins, one you have made your selections click Assign.
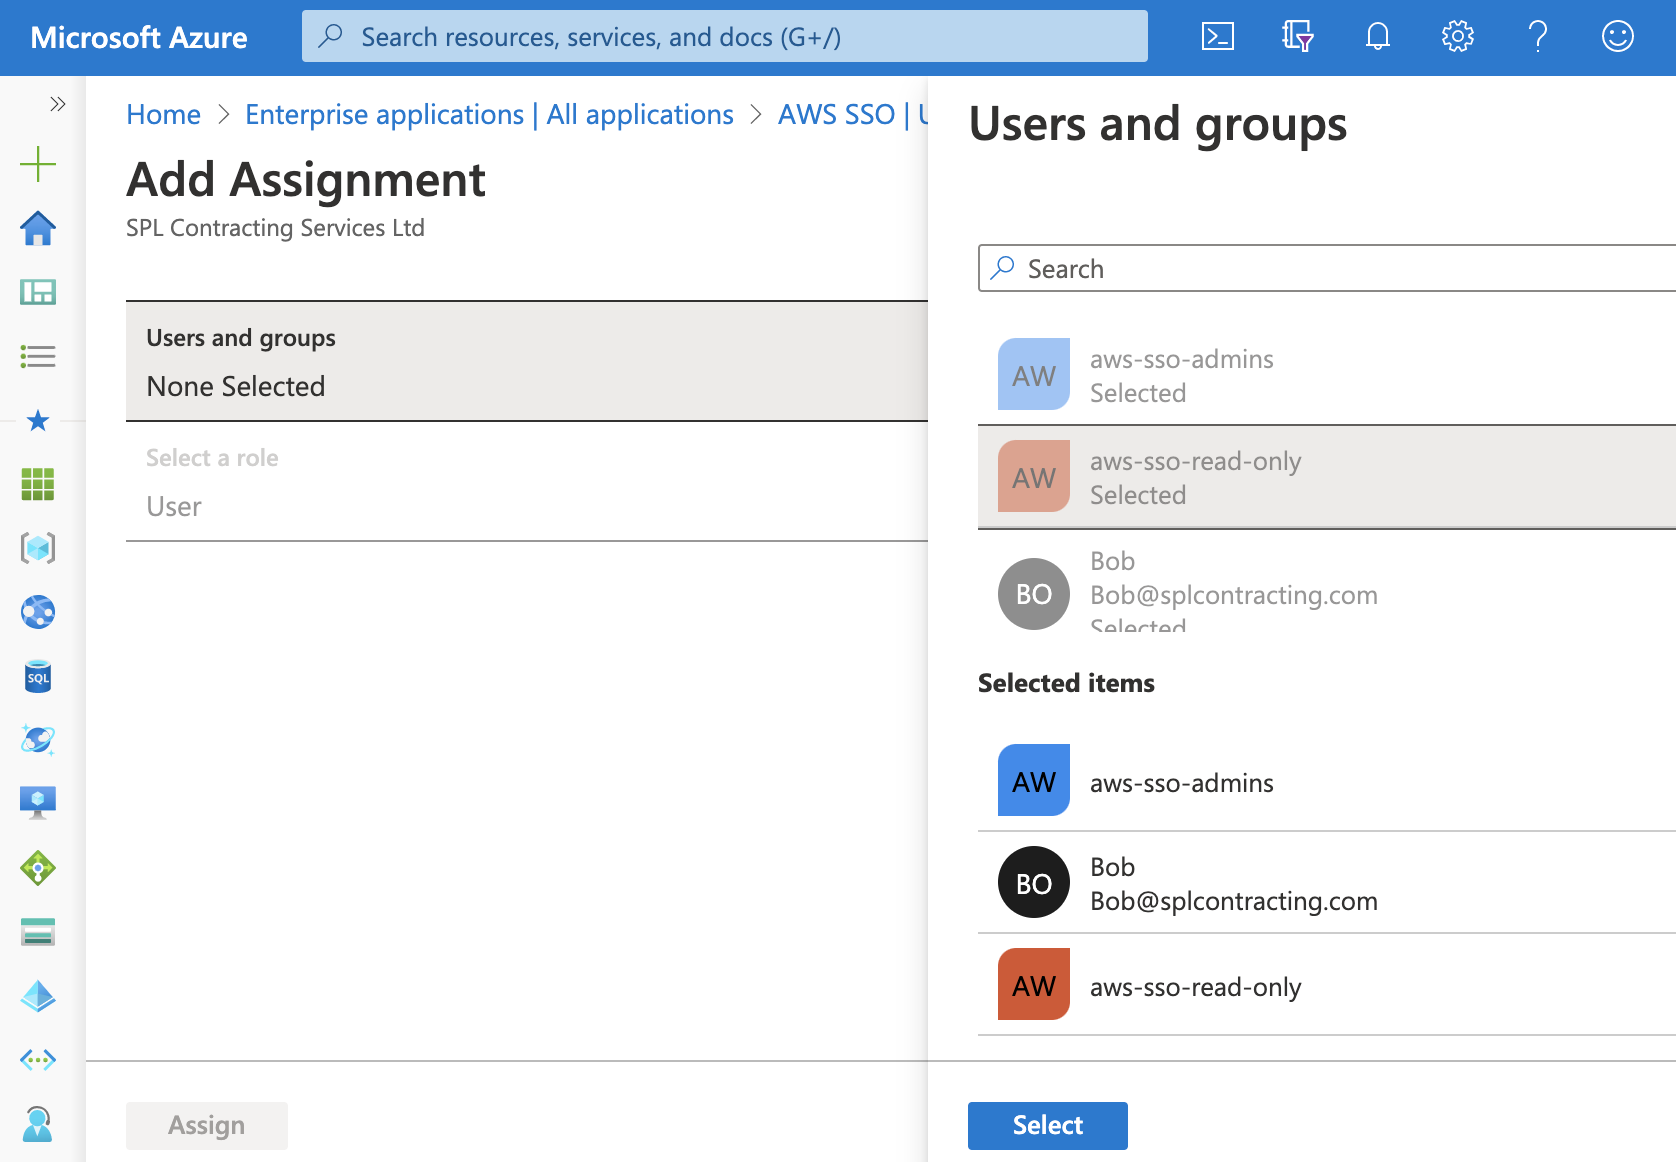
All that is required now, is for us to either wait for the provisioning task to run on schedule, or to save time - we can manually start this.
From your AWS SSO application, select Provisioning from the left-hand navigation panel and click Start Provisioning.
Oh dear…
My provision task errored… let’s look at the provisioning logs, which is linked further down on the Provisioning page.
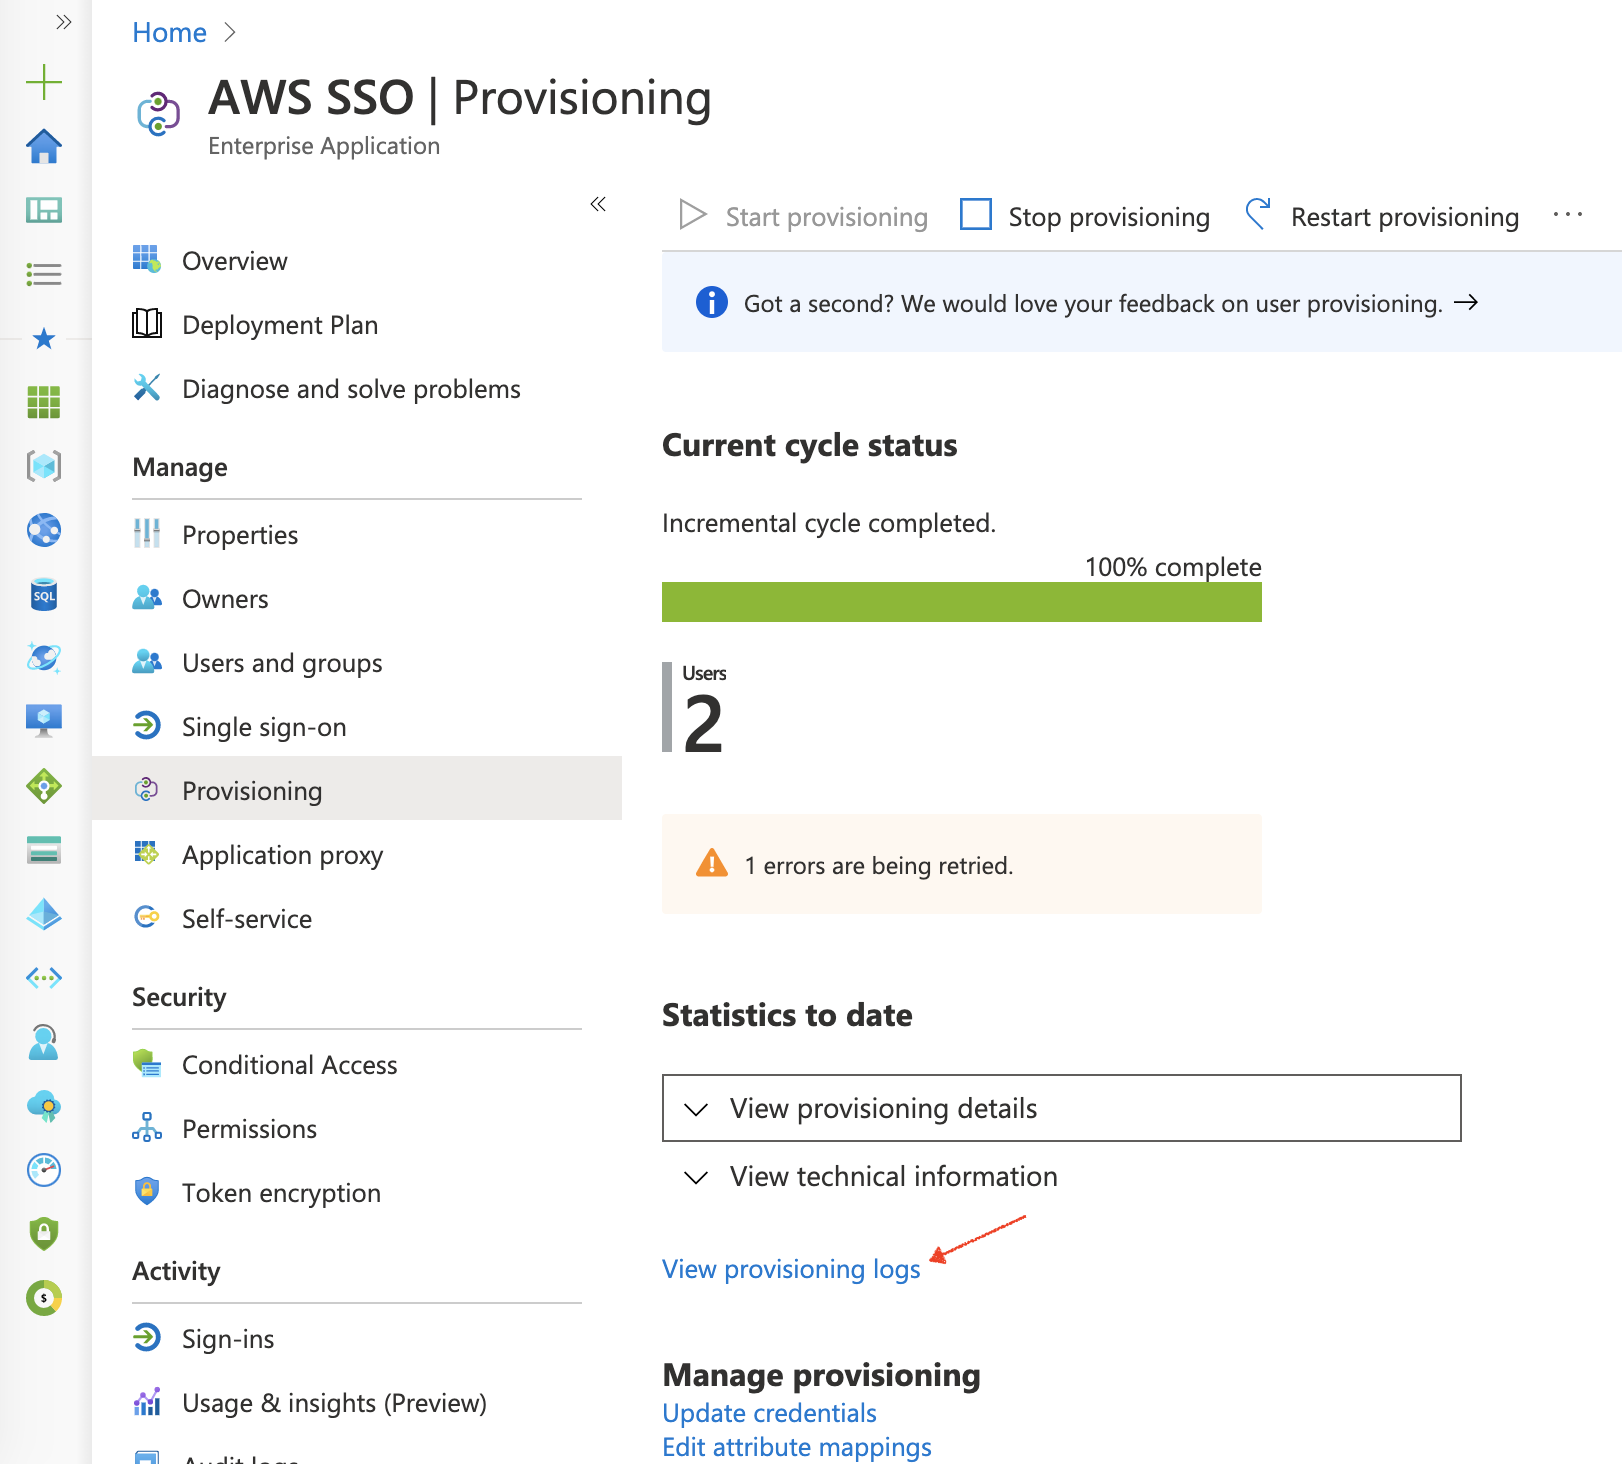
We can see that there was an error when attempting to provision Bob’s user within AWS Single Sign-On.
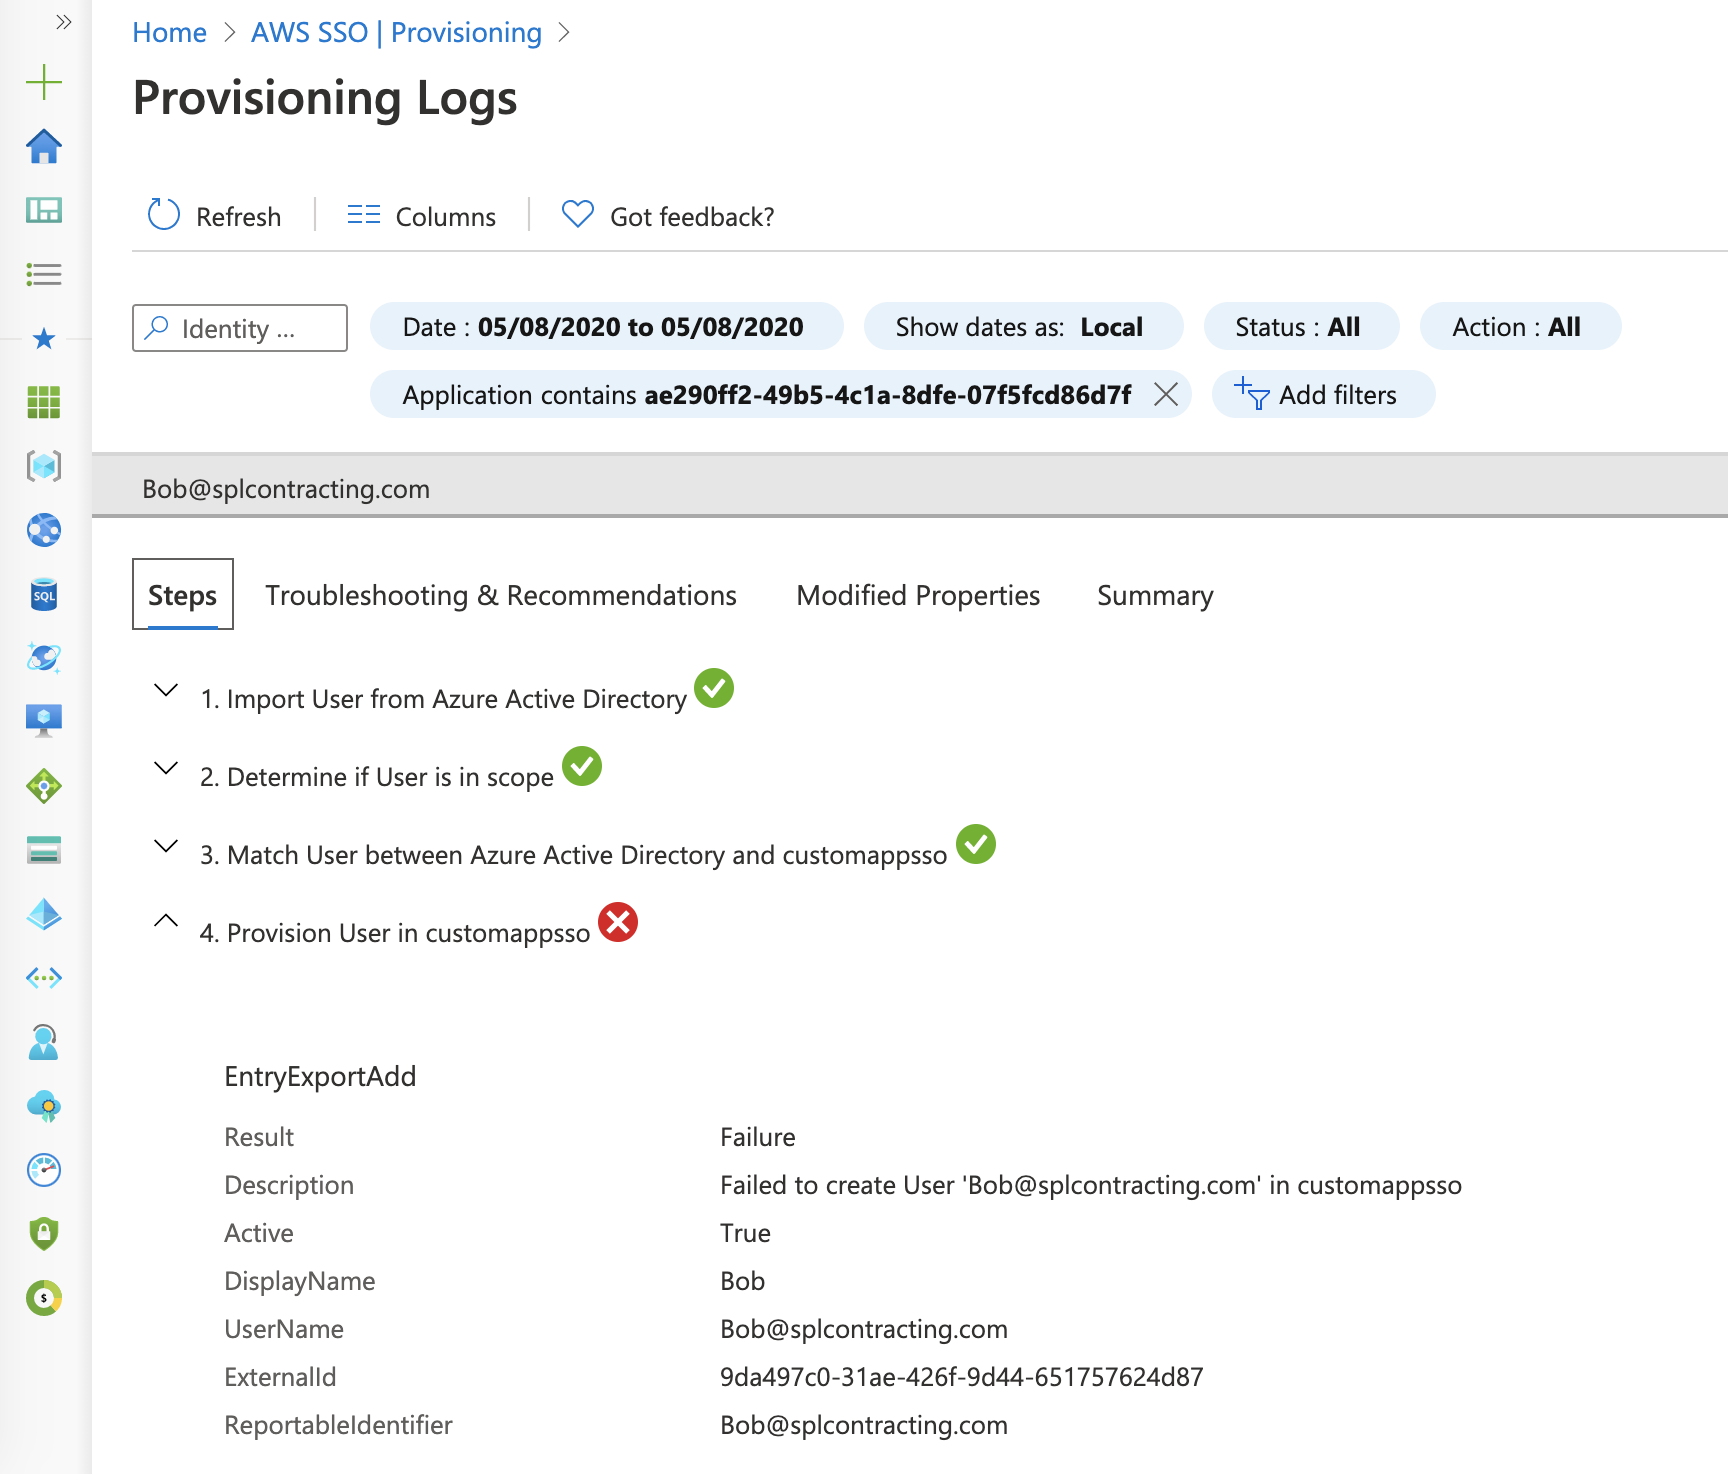
If we select Troubleshooting and Recommendations we can see a little more detail.
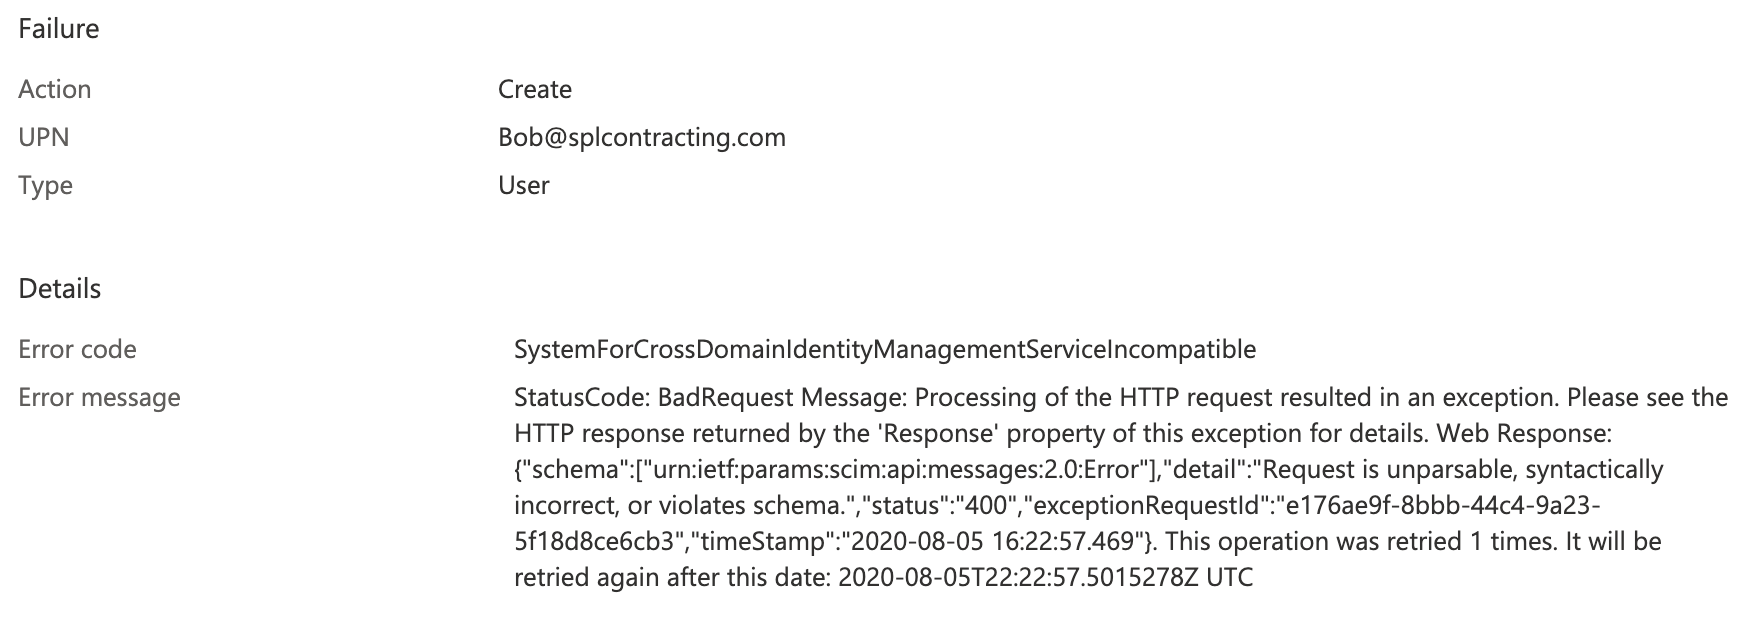
For some reason the request is bad, it contains some syntax error or violates schema.
Let’s head to AWS CloudTrail for the logs on the AWS Side.
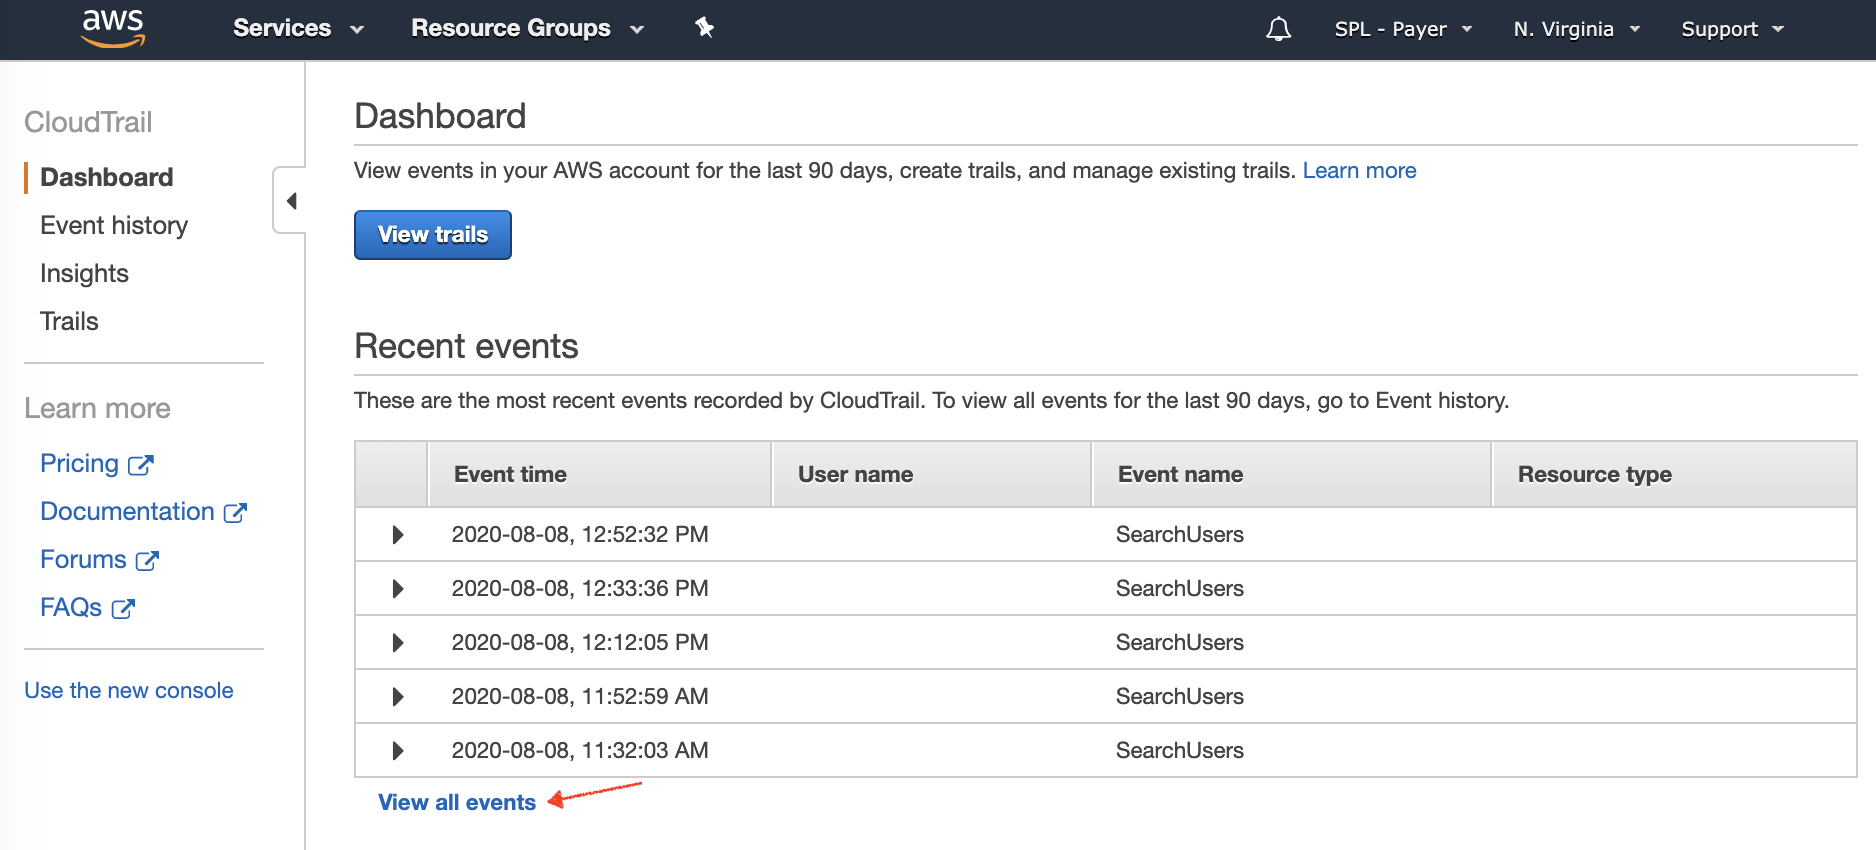
Open a new tab, and navigate to the AWS CloudTrail Console, if you are doing this just after the error look to the Recent events section, otherwise select View all events.
In the Event history page, filter events from the top menu, so we can see events around the time of the error was highlighted in the Azure Console.
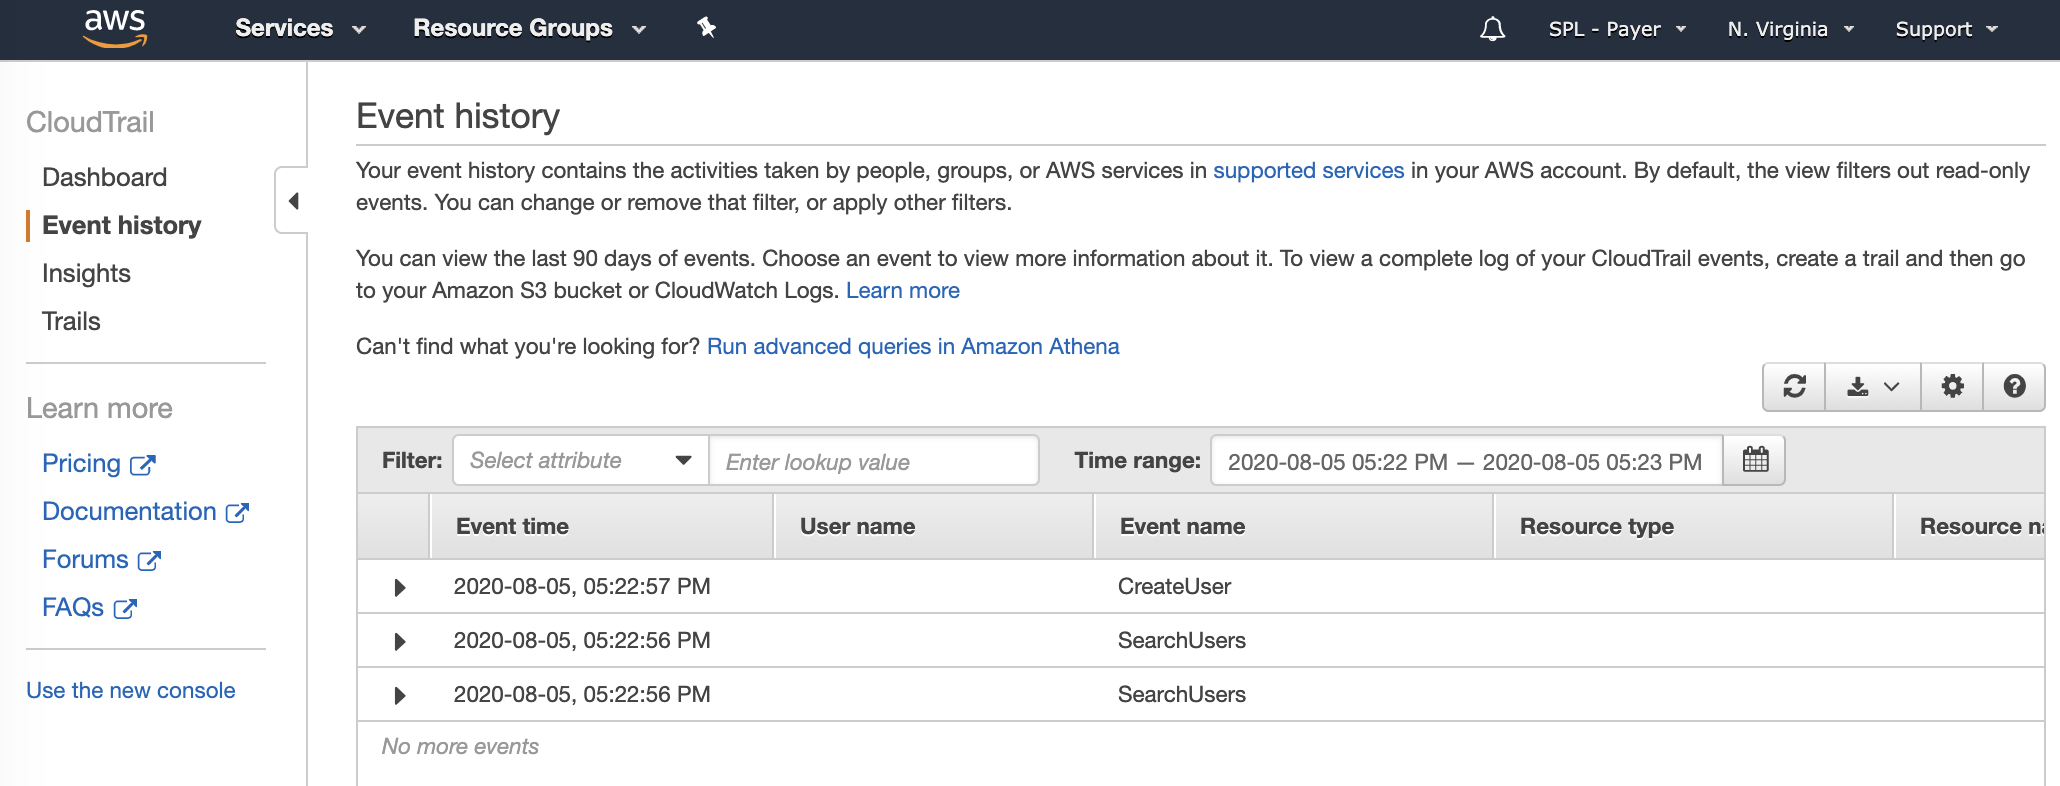
The CreateUser event may give us a little more detail, lets open this and have a look. CloudTrail events are in JSON format and are pretty verbose.
{ "eventVersion": "1.05", "userIdentity": { "type": "Unknown", "accountId": "xxx", "accessKeyId": "xxx" }, "eventTime": "2020-08-05T20:51:08Z", "eventSource": "sso-directory.amazonaws.com", "eventName": "CreateUser", "awsRegion": "us-east-1", "sourceIPAddress": "xxx", "errorCode": "ValidationException", "errorMessage": "name: The attribute name is required ", "requestParameters": { "userAttributes": { "displayName": {}, "externalId": {} }, "active": true, "identityStoreId": "d-90677fa0eb" }, "responseElements": null, "requestID": "cfed0d06-34cd-4350-a802-dd89f6de1722", "eventID": "6f5bac6d-7cb2-4c1a-b3cd-eb2eb2473041", "eventType": "AwsApiCall", "recipientAccountId": "xxx" }
We can see the error message is telling us that we didn’t pass the Attribute “name”, which ties with the Azure error which suggested the provision command was in violation of the schema, it seems the Name attribute is mandatory.
After adding a Name field in Azure AD for my test user Bob, and a re-run of the provisioning task, a user for Bob is created in AWS Single Sign-on along with the Groups we also added.
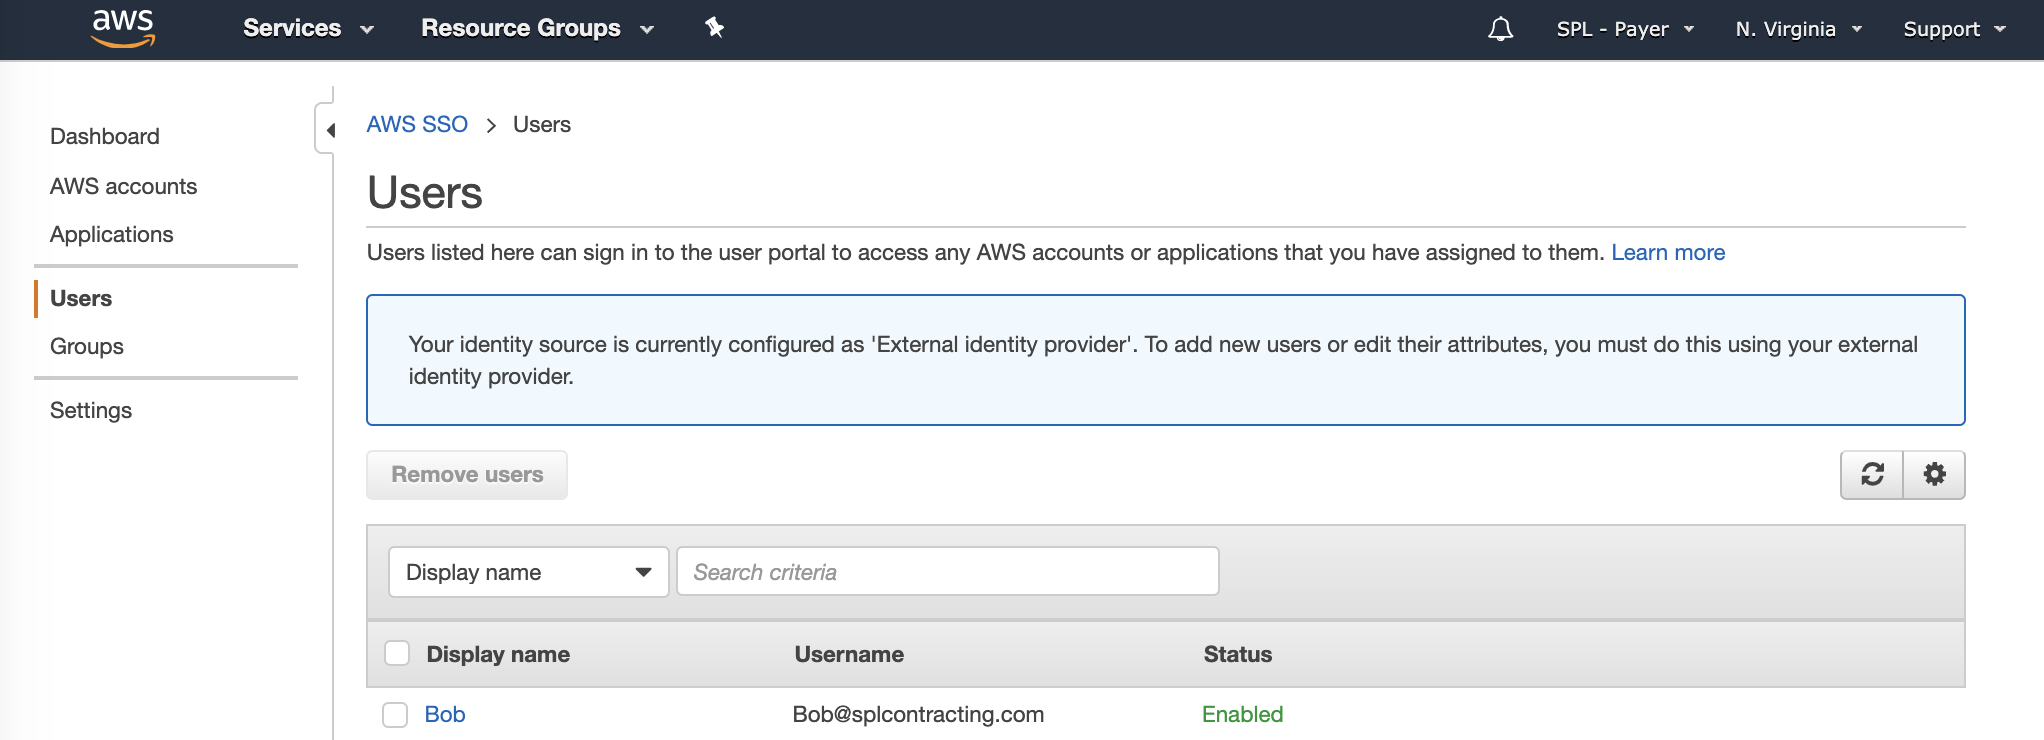
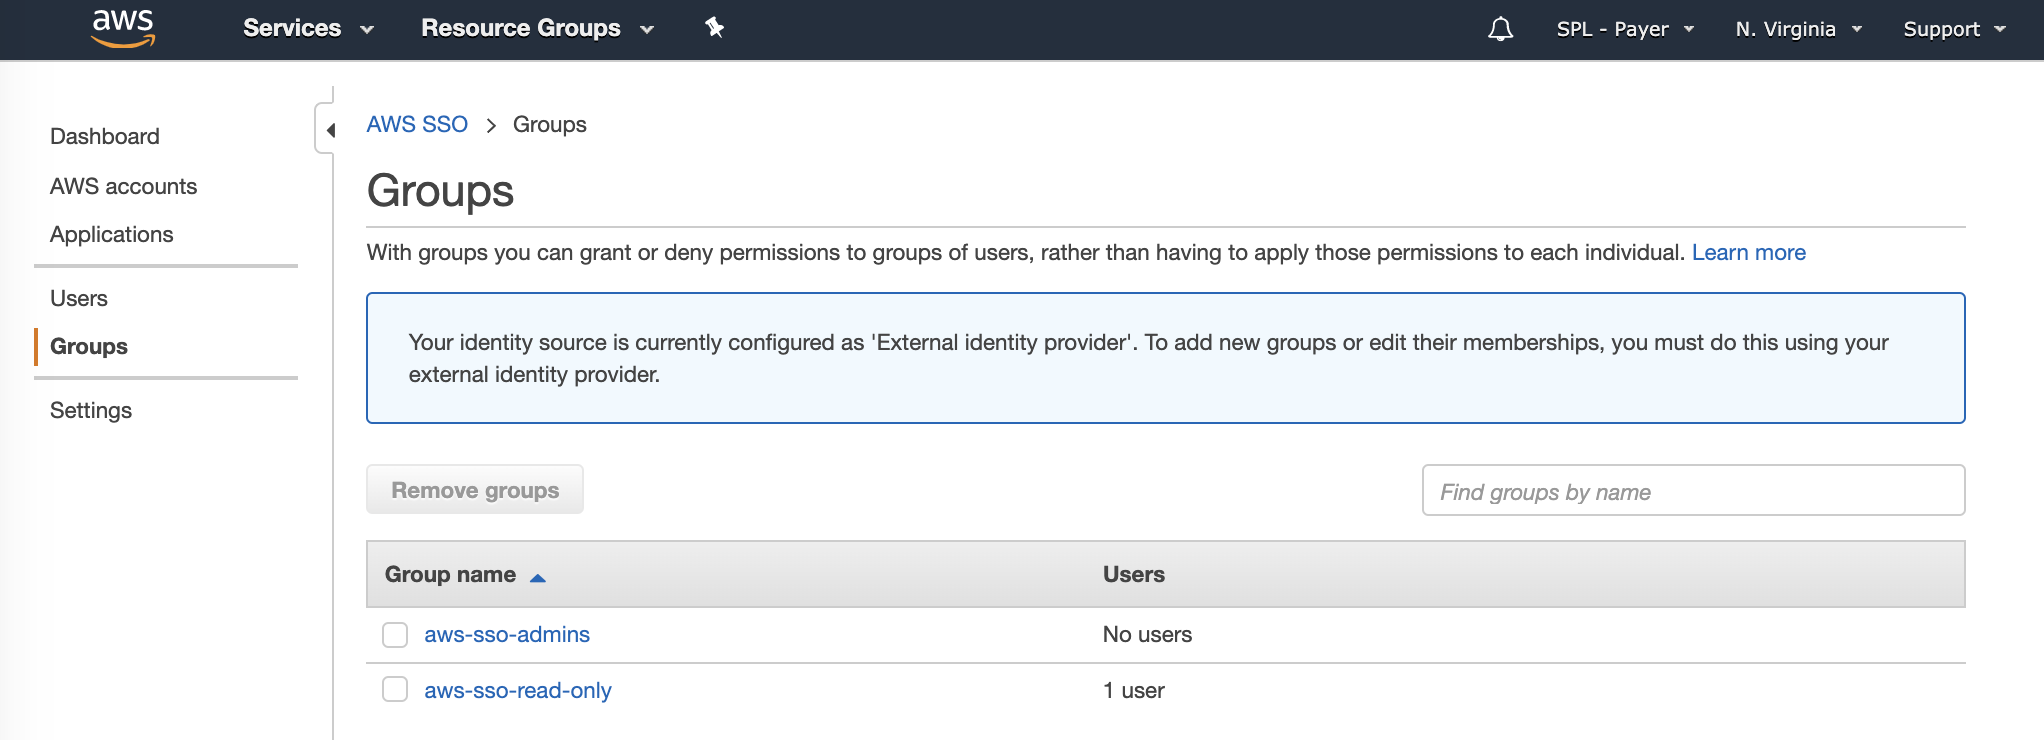
Assign Permissions in AWS Single Sign-On
Now we have synced our users and groups to AWS Single Sign-On, we need to grant access within AWS using Permission Sets.
Using a Permission Set, available from the AWS Accounts and Applications links in the navigation panel, We can associate one or more access control policies (custom policies I have created, or AWS Identity and Access Management (IAM) managed policies), to both groups and users, thus controlling permissions once users sign in.
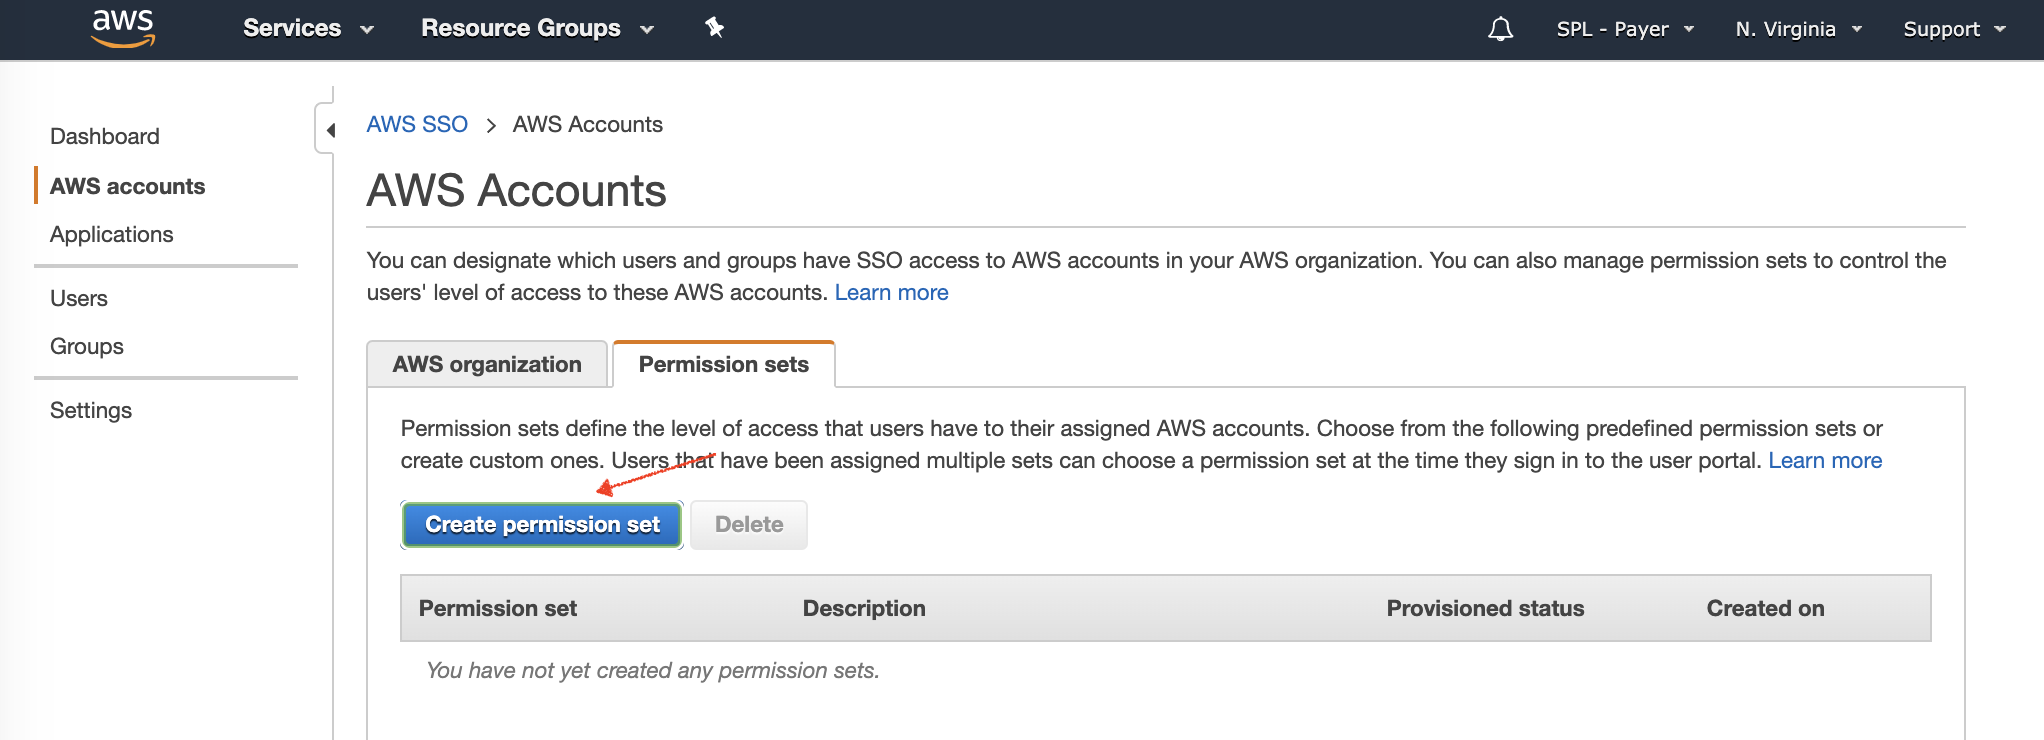
First let’s create a permission set, navigate to the AWS Single Sign-on console, then go to AWS Accounts, open the Permission sets tab and then click Create permission set.
From here we can make use of an existing policy or create a custom permission, let’s use the existing ViewOnlyAccess policy, select this then click Create.
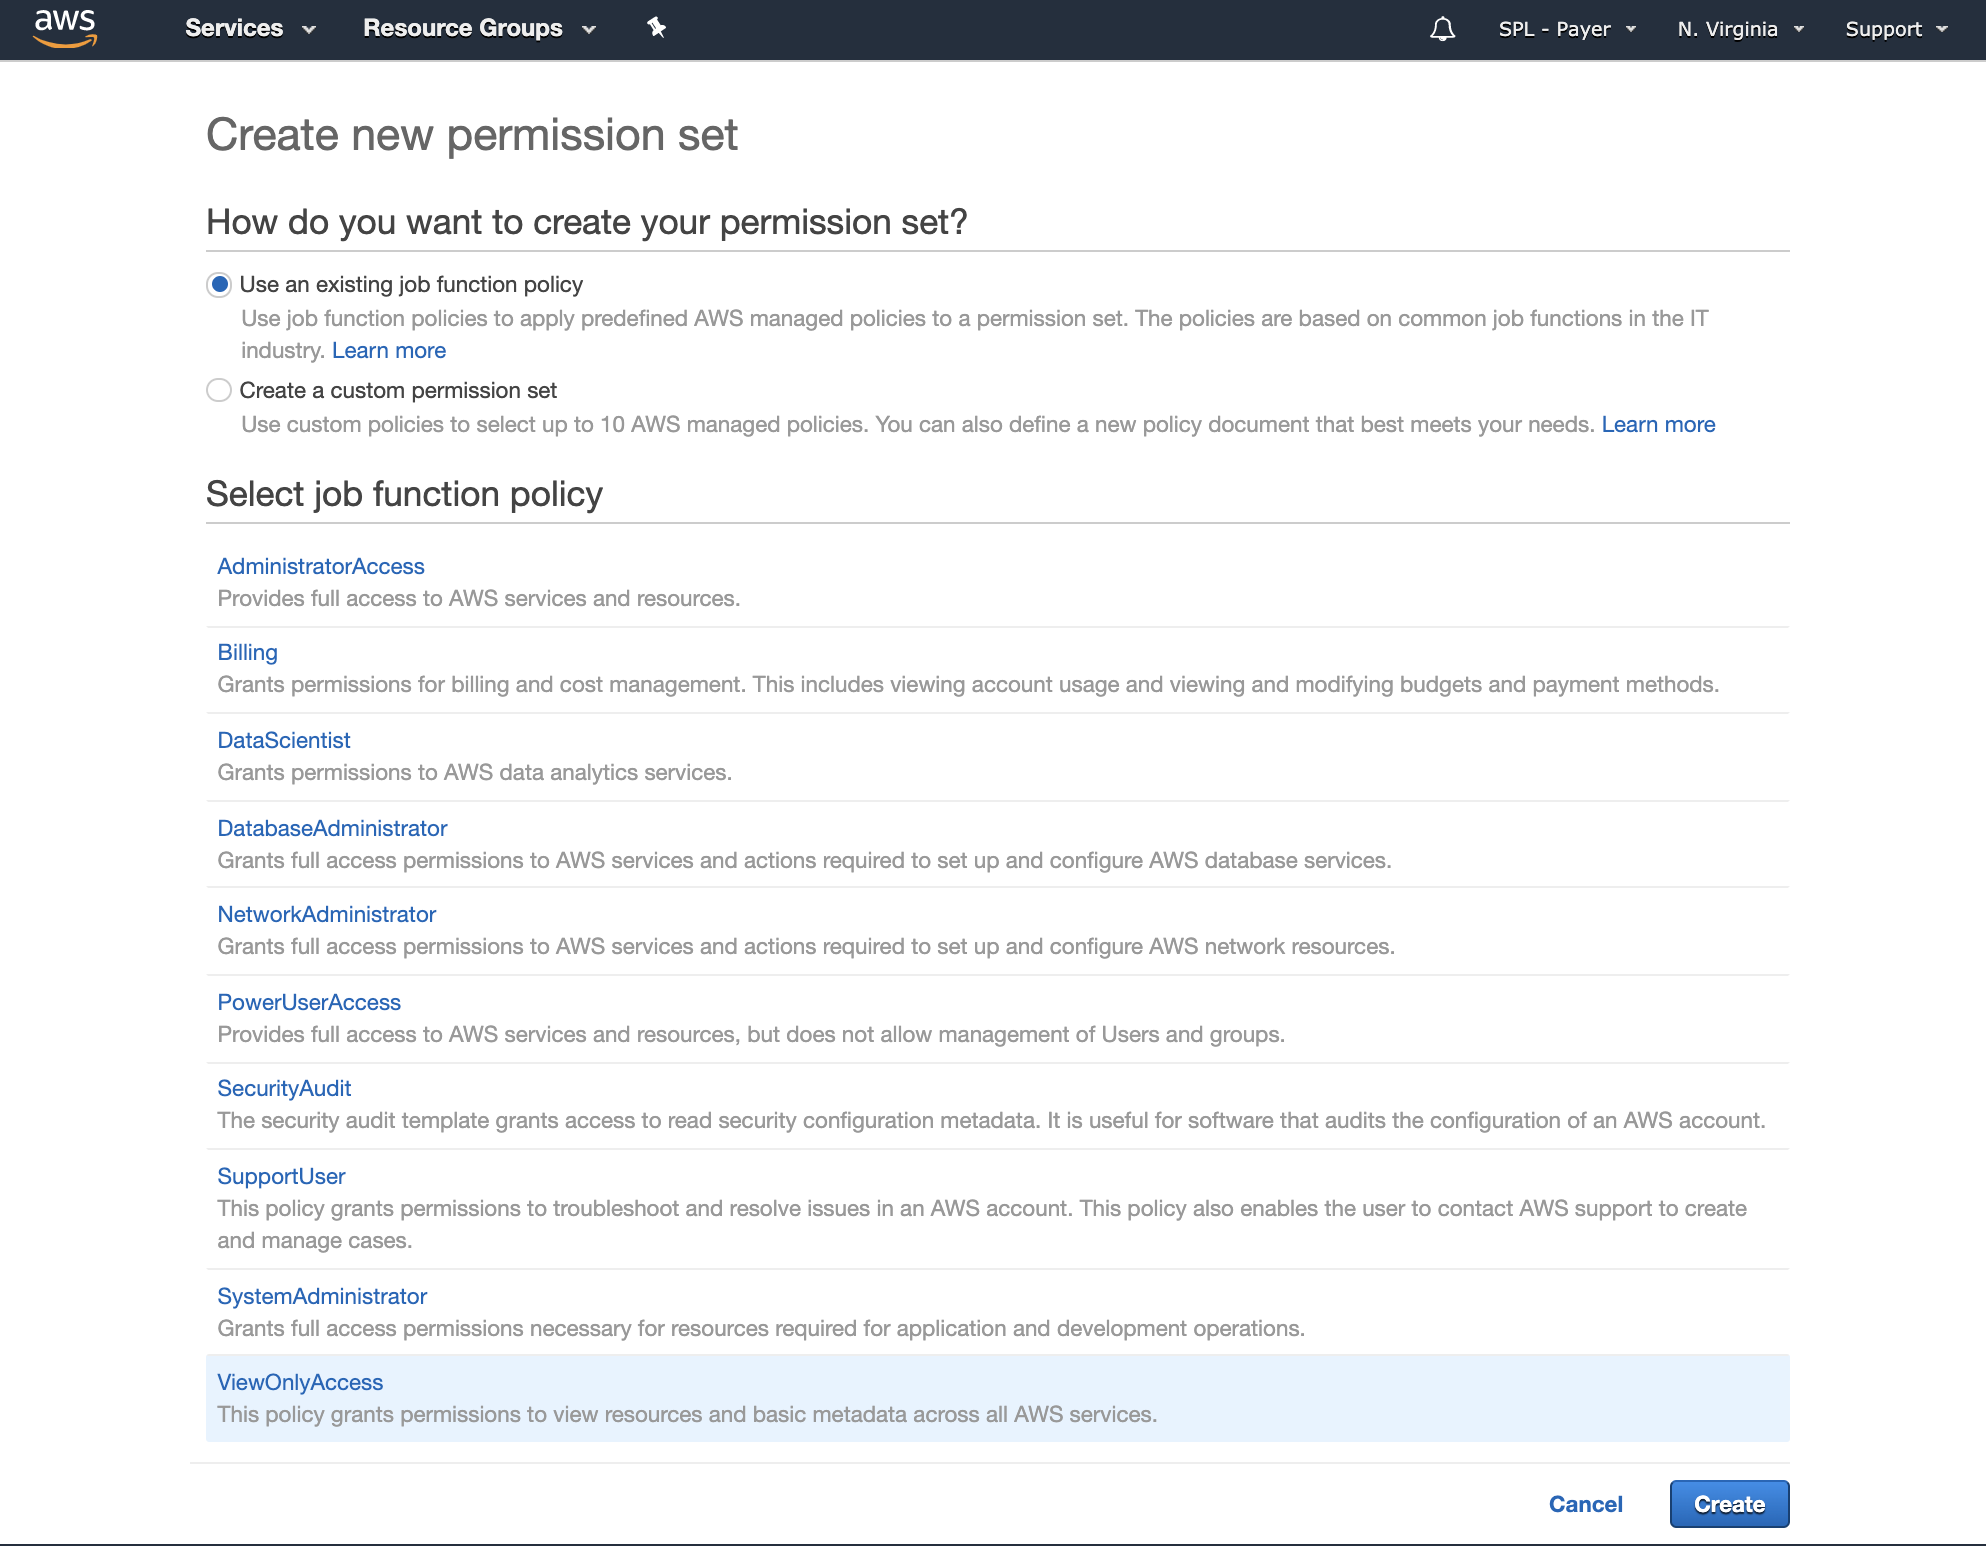
Next we need to map our newly created permission set to our group aws-sso-read-only, which Bob is a member of.
Go back to the to the AWS Single Sign-on console, select AWS Accounts and under the AWS organization tab select your account.
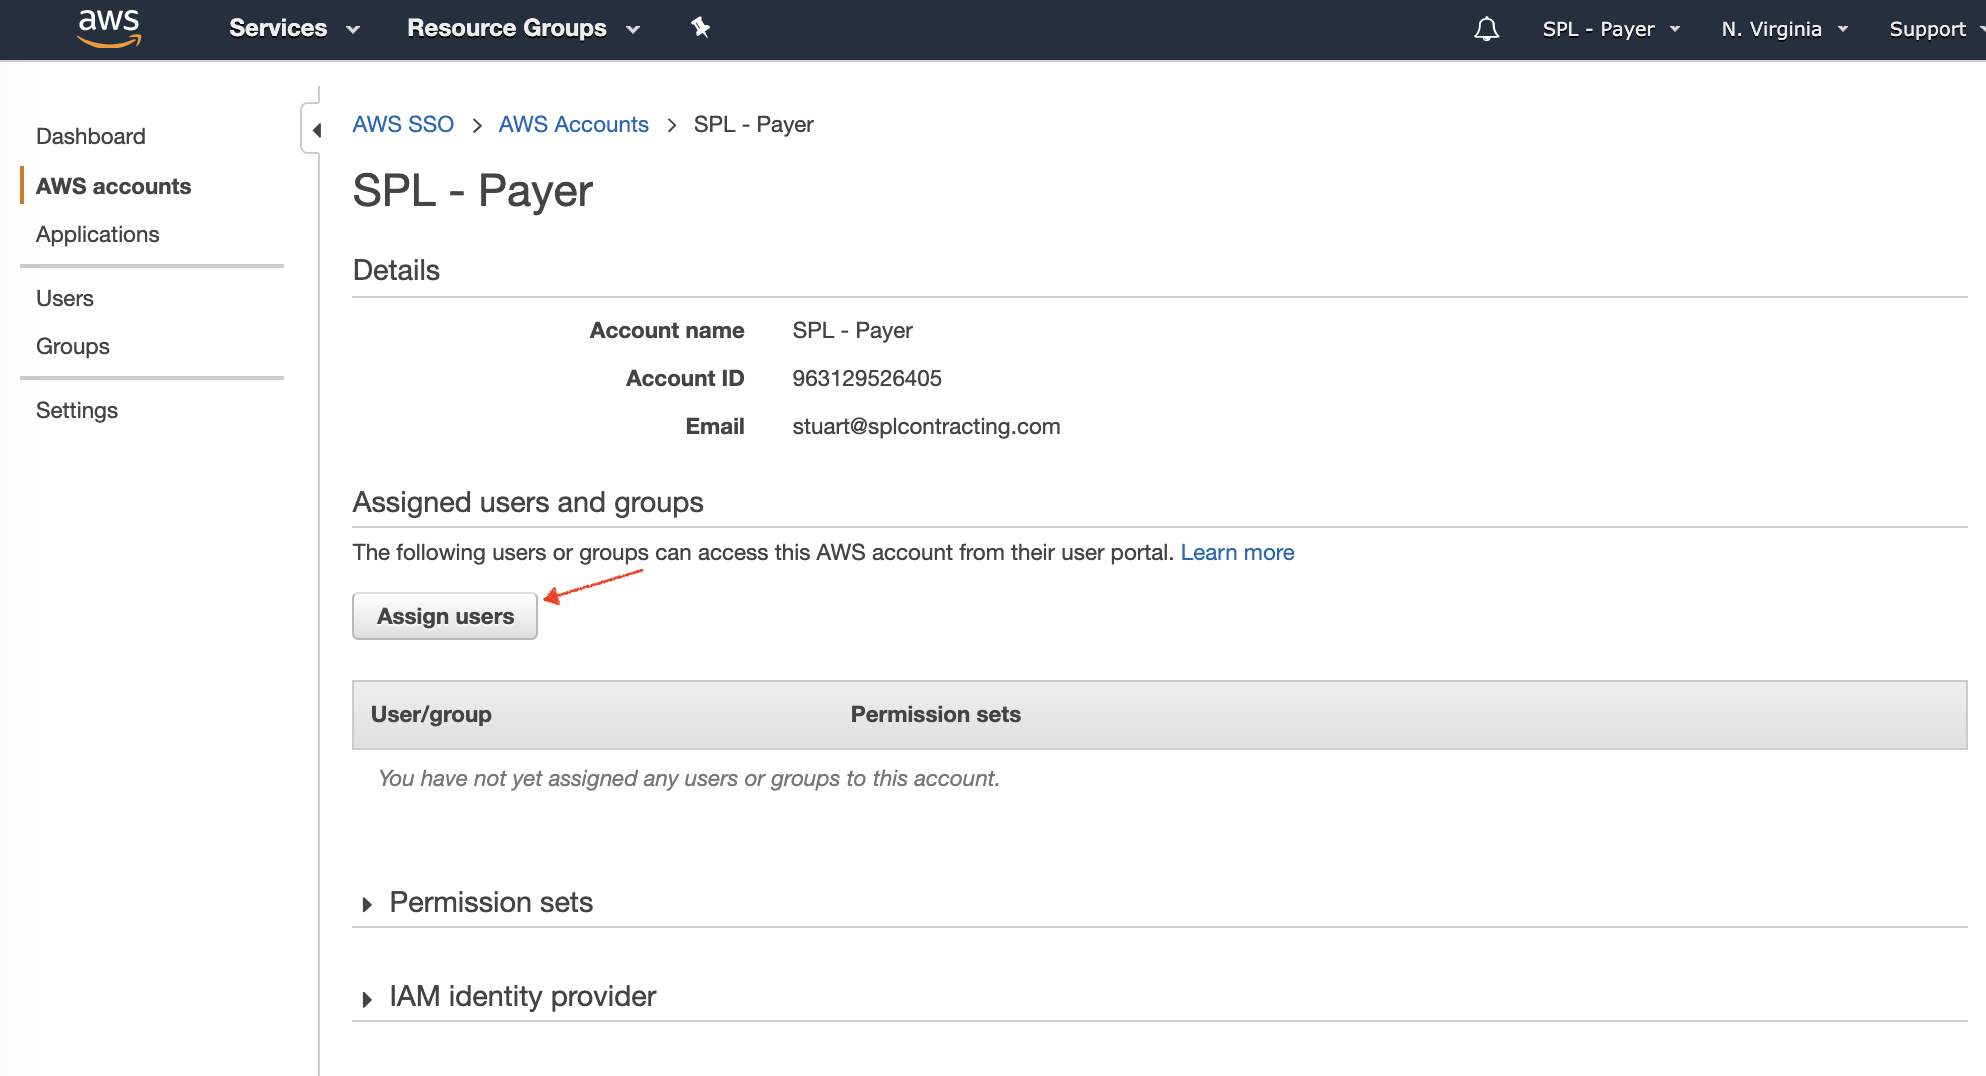
Click Assign users.
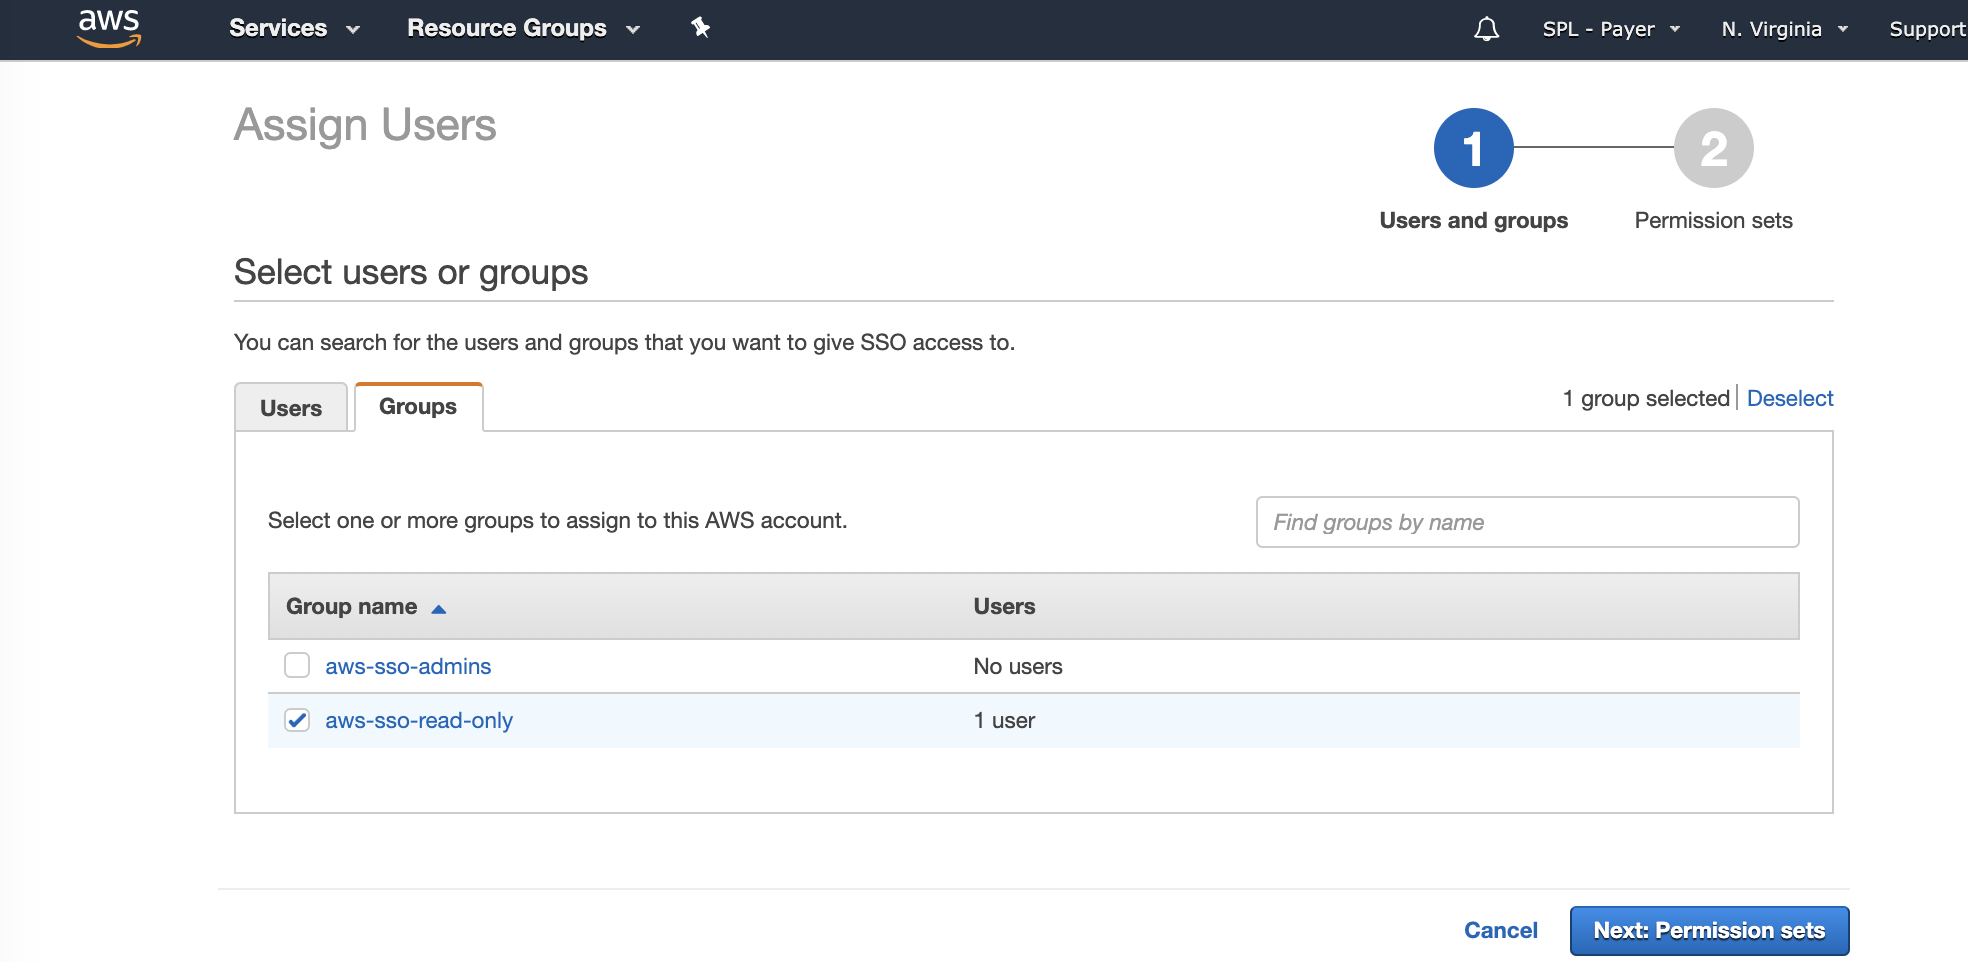
Open the Groups tab, select the aws-sso-read-only group then, click Next: Permission Sets.
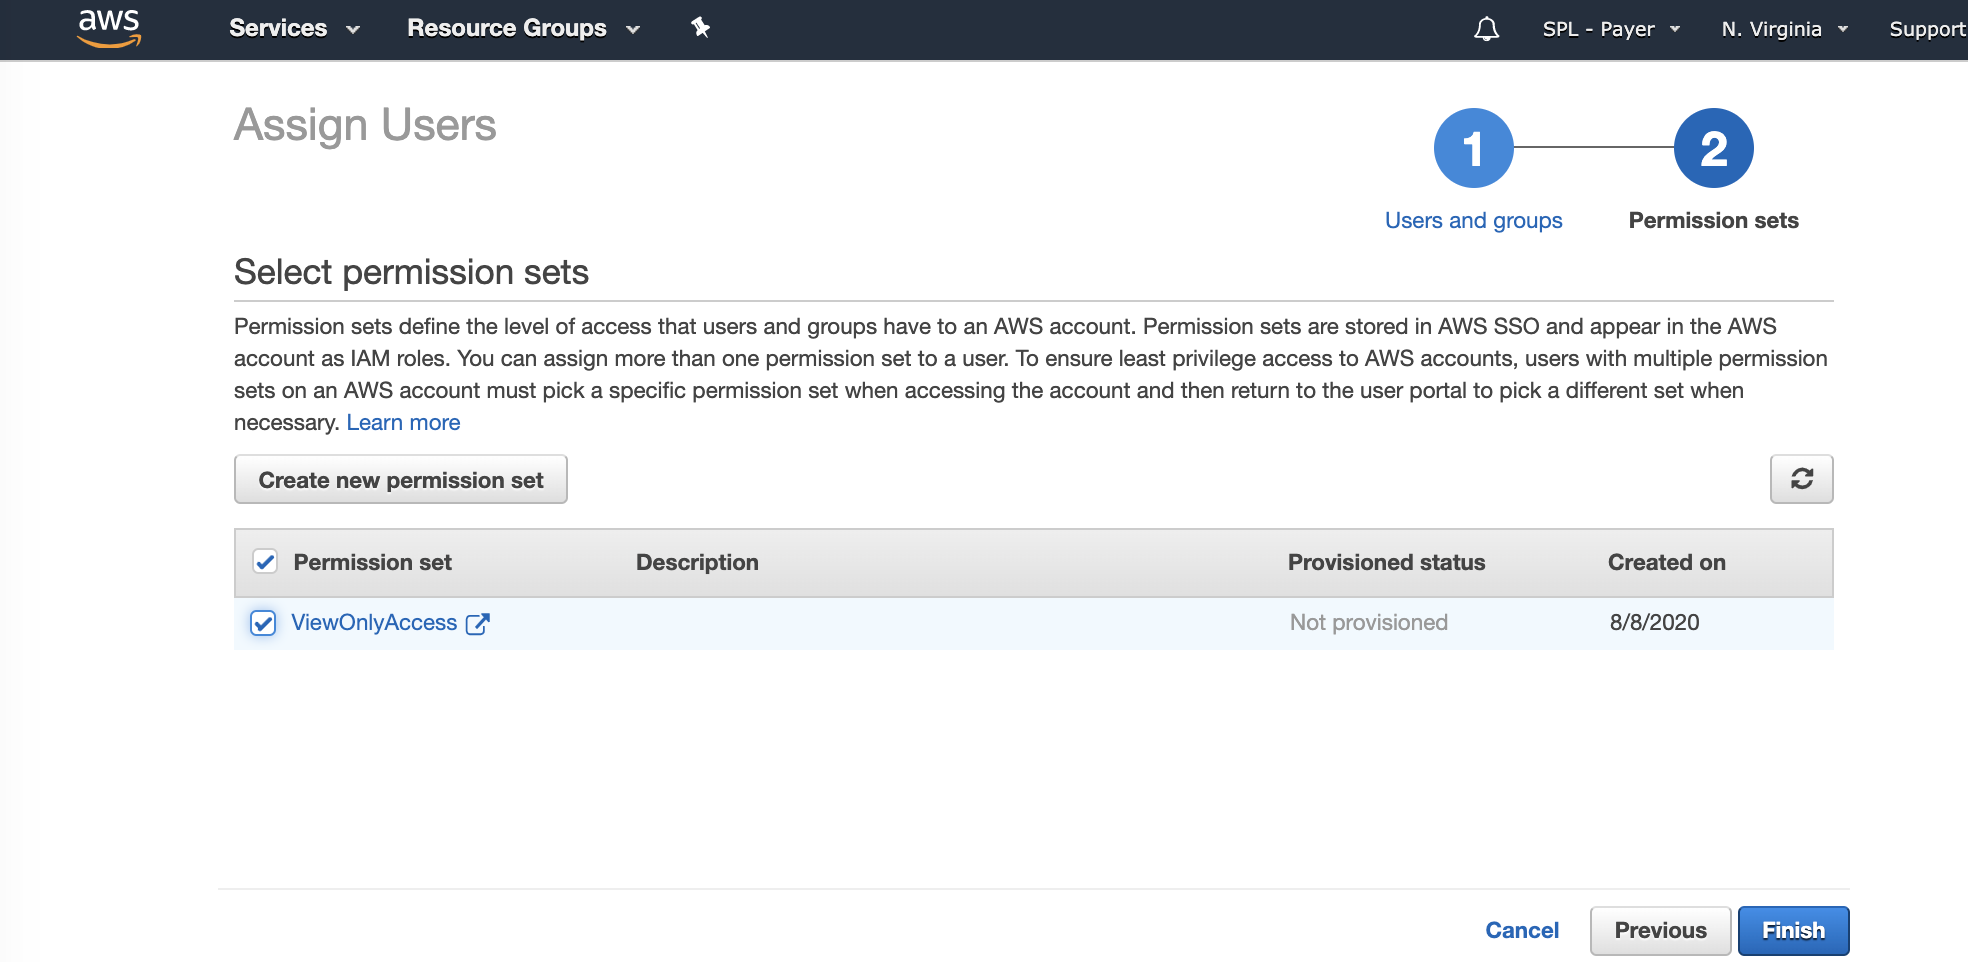
Select the ViewOnlyAccess Permission set that we just created and click Finish.
Now we have a assigned the permission set ViewOnlyAccess to the group aws-sso-read-only, Bob and any future users who are added to that group in Azure AD will automatically be provisioned and will have rights to log into AWS and perform read-only duties.
Test
Let’s confirm Bob is now able to log in to the AWS Management Console, Navigate to the My Apps Portal and login with your test users credentials.

All we have to do is open the AWS SSO app, wait for SSO to do its thing then select the desired logon option - AWS Management Console or Command Line / Programmatic Access.
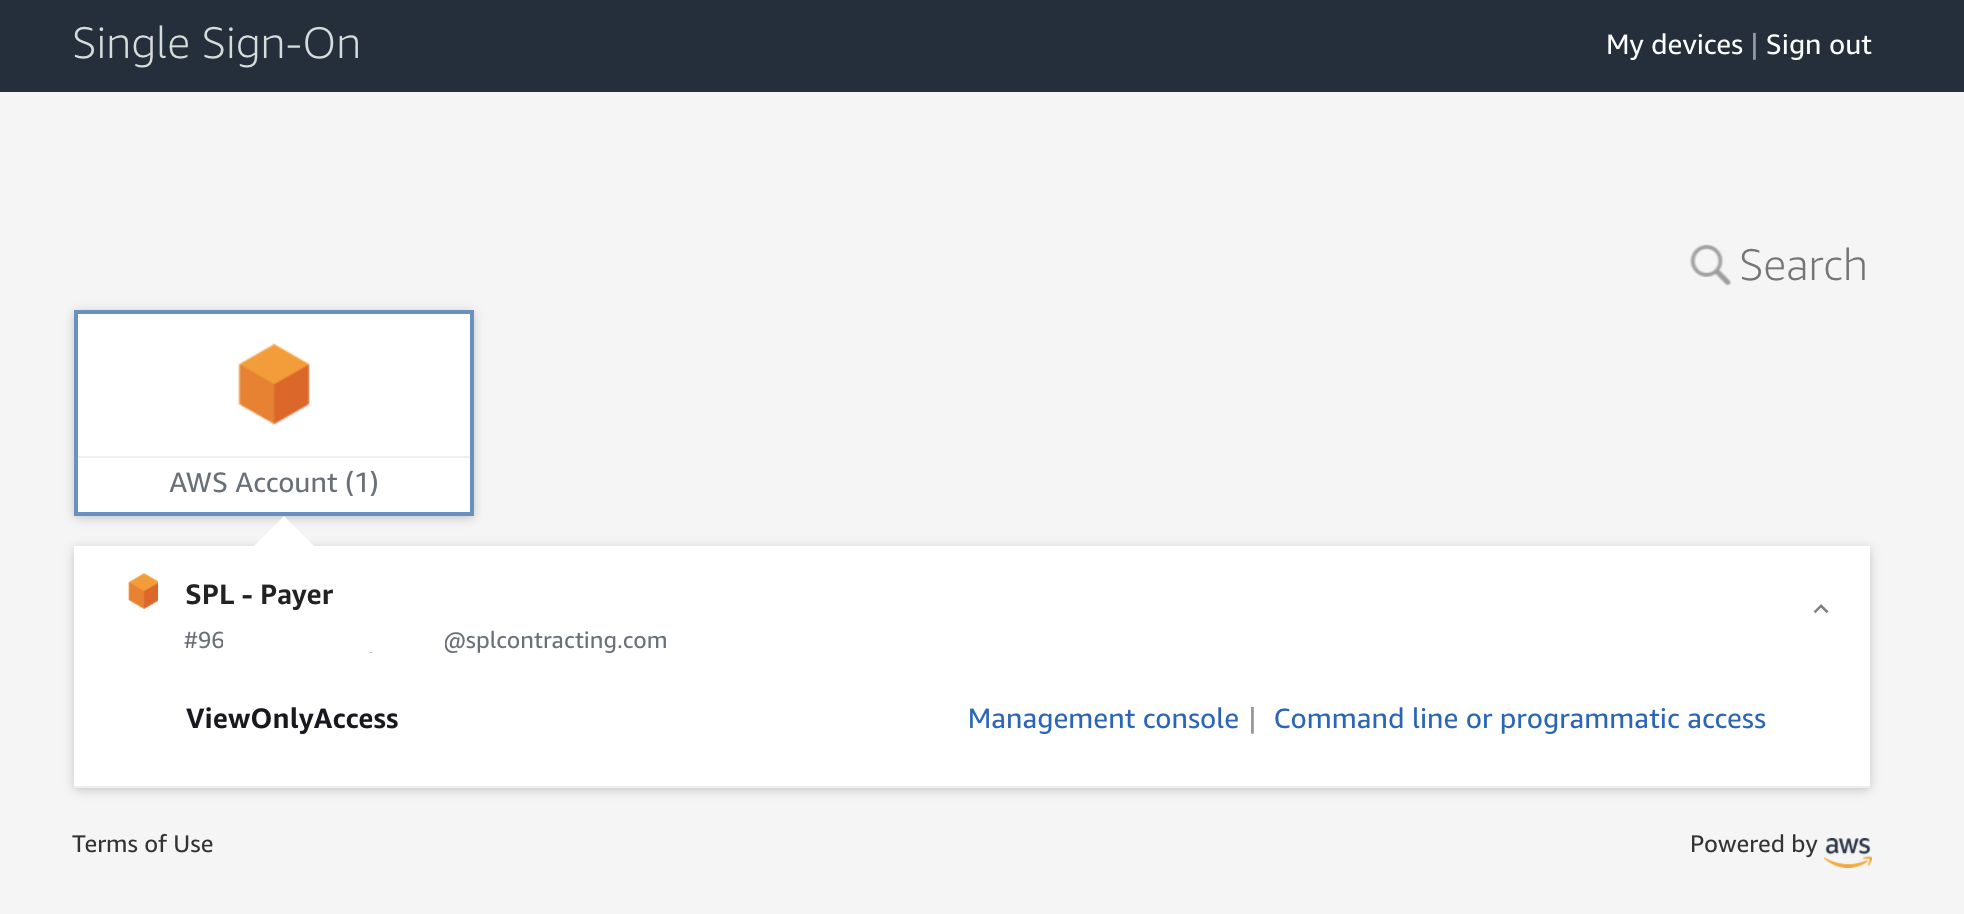
Now we have a fully automated solution for our Azure Identities to be able access our AWS Accounts. This solution can scale to many accounts if required, users will simply have to just select the account they wish to assume into.
If you have found this post useful, please upvote below or comment :)